The continuation of the 80 page, 274,000 views TVvoodoo's Insanitarium (slight return) thread from AGF 2010-2020, which was nuked when the forum was sold off to/from some money-grubbing MOMOfukkers.
Dunno what's gonna eventually end up in here, but we can start with a new black leather & wasted denim "Shakey Strap" fresh off the bench a couple of days ago.
My hands will still be busy - they don't stop, and well, we gotta start somewhere.
All comments welcome, open door policy here.
(Don't Fear) TVvoodoo's Insanitarium
Endless source of eye-rolling dad jokes, aspiring empty-nester, custom strap-maker https://reverb.com/ca/shop/well-hung-guitar-accessories
Thanks JB. It hurts a little bit for sure. Kind of like losing a family pet, and empty hole. But... I've been in TV, print journalism, advertising for most of my life. You know this as well...
We sweat and toil and create it, put it out there, and it's gone. The best part of something like this is the sharing the spirit of creation. This is merely the documentation, and far less important.
I predict the same thing will happen again. My biggest hope is ten years from now it still pushes my pleasure button to keep conceiving, building
Endless source of eye-rolling dad jokes, aspiring empty-nester, custom strap-maker https://reverb.com/ca/shop/well-hung-guitar-accessories
- sabasgr68
- Reactions:
- Posts: 1399
- Joined: Wed May 27, 2020 10:11 pm
- Location: Venezuela, Caracas
- Gearlist: Mossman Sunking Strat (model MN001) - Zoom G3xn - My hands
- Contact:
But did you manage to back up all the pages prior to 80, Brad?
I´m the guy from Venezuela (Not Communist/Socialist) - Catholic - Husband - Father
Looking for online/remote job - Income on the internet
Always grateful to the AGF community and friends
AGF refugee - Banned by MOMO
Looking for online/remote job - Income on the internet
Always grateful to the AGF community and friends
AGF refugee - Banned by MOMO
No I have not, but brother kirobhan messaged me that he has some kind of backup of the thread, so I'm waiting to see what he has before I go repeat that...
Endless source of eye-rolling dad jokes, aspiring empty-nester, custom strap-maker https://reverb.com/ca/shop/well-hung-guitar-accessories
- sabasgr68
- Reactions:
- Posts: 1399
- Joined: Wed May 27, 2020 10:11 pm
- Location: Venezuela, Caracas
- Gearlist: Mossman Sunking Strat (model MN001) - Zoom G3xn - My hands
- Contact:
Great!
I´m the guy from Venezuela (Not Communist/Socialist) - Catholic - Husband - Father
Looking for online/remote job - Income on the internet
Always grateful to the AGF community and friends
AGF refugee - Banned by MOMO
Looking for online/remote job - Income on the internet
Always grateful to the AGF community and friends
AGF refugee - Banned by MOMO
Are there any thoughts about another run of the military distressed straps? I was too late to the game, but they look superb!
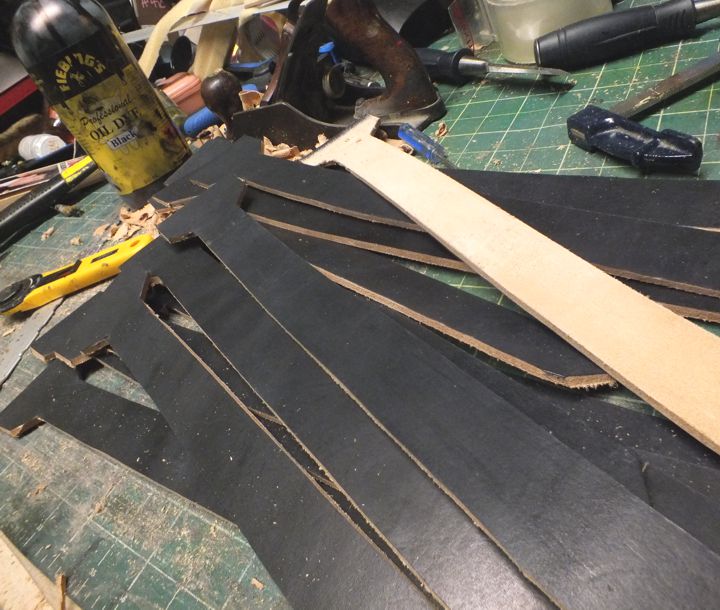
First real post in the new digs here is not too exciting, unfortunately, but something to show anyway, never showed this before. Kind of a maintenance day in the straplab. Over a number of years of doing this, I have developed a few of my own strap styles which utilize the same basic black leather tail strap. This, because one of the most tedious parts of strapmaking (to me) is making those stupid tail straps. We need them, but they just aren't fun! And, they really slow down creative momentum. Having a bunch pre-made and 80% ready, keeps my little shop moving so I can stay in the zone. Plus when you use leather dye, you want it to sit for a good while, so that dye can settle in real good, before sending the strap away.
So, every once in awhile I need to replenish my tail stock - I normally make a dozen or so at a time, and when I do it this way there is no sacrifice in quality. Today was that day.
You know, we as guitar players hardly think about the tail strap. Most of our focus ends up on the nose, or front of the strap for some reason. To me as a strap fella, this makes tail straps even more important they are made as fail-safe and futz-free as possible. I don't want you to have to think about it much either
I'm mostly using vegetable-tanned saddle skirting cowhide specifically for these and dye it black, 'cause it's the most economical way to do it. A few hundred bucks for a hide, I can normally get four, maybe five dozen tail straps, out of it, and can use some scrap bits for nosepieces often too. This skirting is real good and very strong, heavy-duty leather. First before cutting my tails out, I dye it black twice on the skin side with Fiebings Pro, alcohol based dye, a brew I get by the liter - use a lot of it, and it can get messy. One time I even spilled about a quarter of a bottle on my work table. ugh!
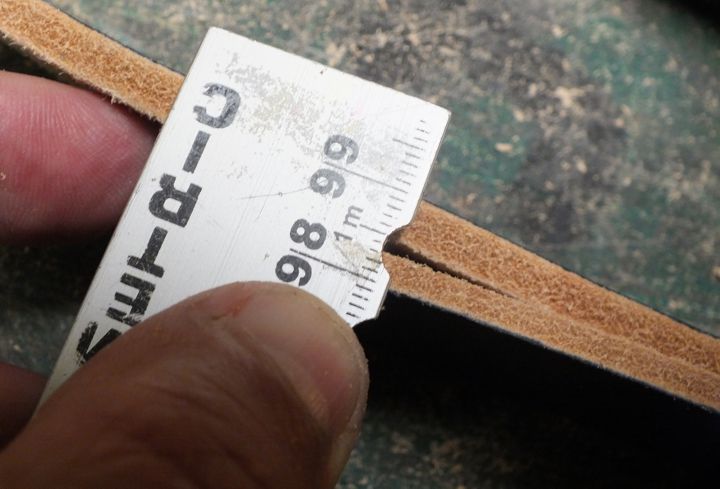
Anyway, 12/13 oz. weight leather on the top above, is about 5mm thick, closing in on a 1/4". That's too thick for easily going on a normal strap button, so once I have my tails cut out, I gotta to do some "skivving". This is the function of thinning it down so it's more useable. There are power skivving tools (never tried), and dedicated hand tools also, which I've tried but the few I have purchased kind of suck.
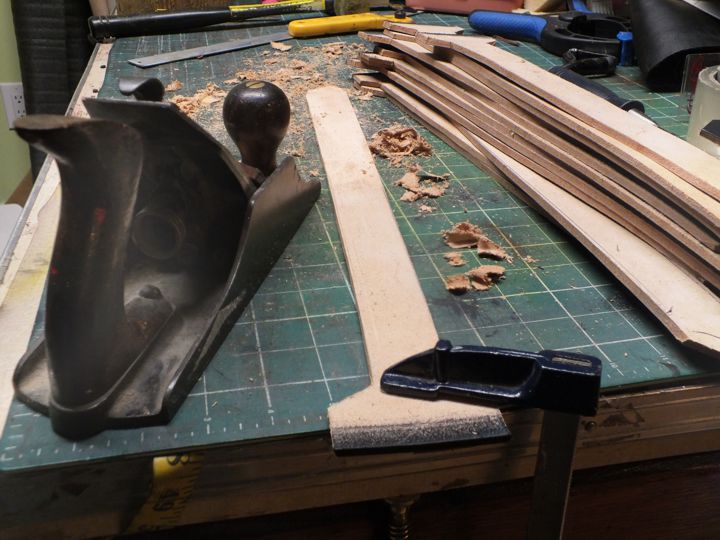
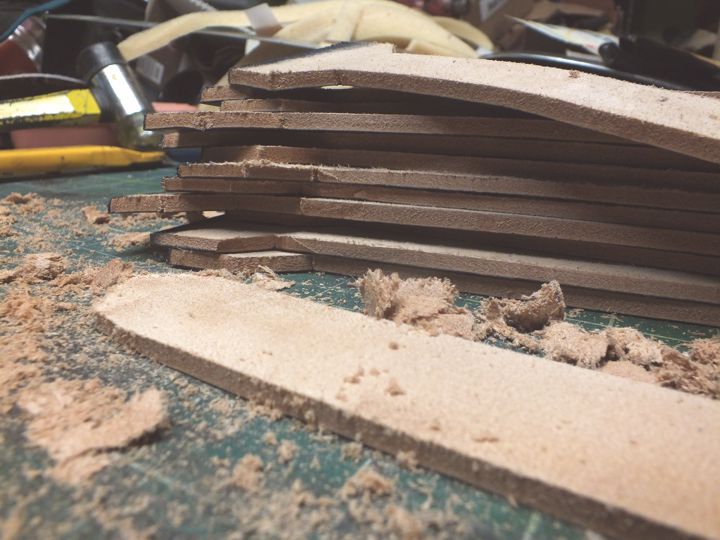
Being a make-do kind of fella, I have developed a decent workaround using a carpenters hand plane. Clamp one end to the table, and have at the last few inches of the strap to bring it down. It's manual work, and needs a little muscle. But about ten or twelve good strokes gets 'er done. I only do this with the last few inches of the strap.
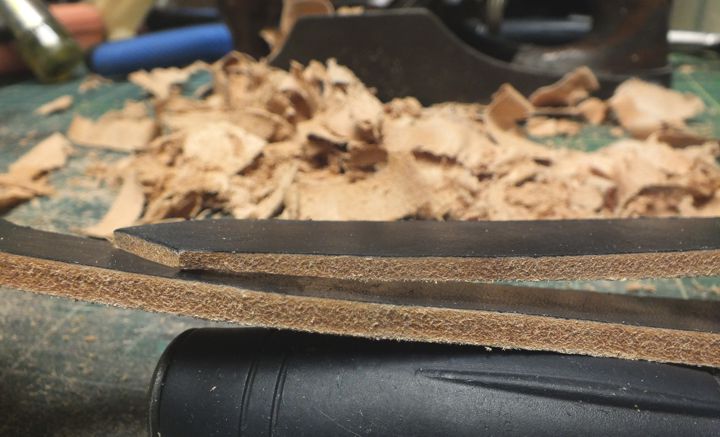
It's not really an exact science, but I have a feel for when it's right. In this case I'm trying to take about a third off, resulting in a leather end a bit thicker than you many of you are are used to for nose and tail bits. It's a bit stiff too, though it softens up a bit with some use. Most find they don't need beer gaskets with these. They are not going to pop off the pin when you bend over to tweak a pedal. I do pre-work them in before sending so they go on a strap button (have a few screwed right into the edge of my bench) without you sweating and straining your delicate little fingers too much. But remember this: the easier a strap goes on, the easier it can fall off!
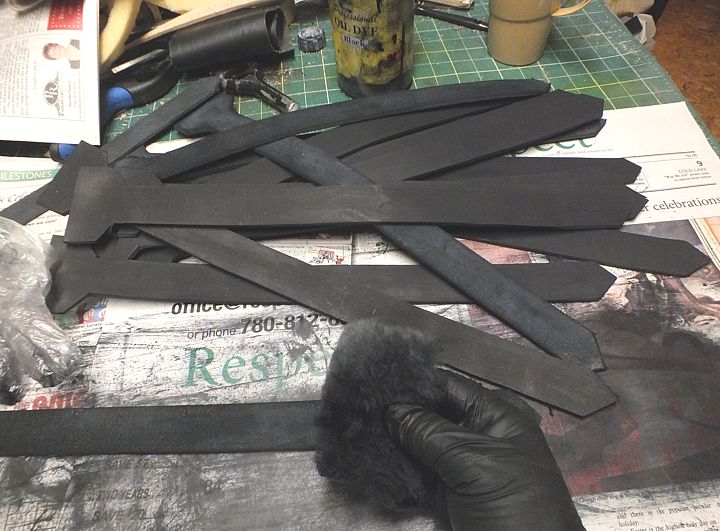
After I get them shaved down, I dye the sides and the back. Gotta get rid of that pinky skin colour. It's a bit creepy to me.
I don't put a whole lot of dye on the inside of the tail straps. Just enough to turn it black, and over the course of a week it will fade to dark grey.
I use a sheepskin pad, it's just the best stuff for working with dye. I keep one dedicated for black. At this time i also go over the front/skin part of
these a third time to make sure they are none more black.
To finish these, once the dye sets in for a few days I will run over them with some neatsfoot oil, and let that get in the cells good, then finish with a mink oil boot conditioner to lock everything down. When I add these to a finished strap I will also burnish the sides to seal all the natural oils in, and give them a nice finished feel. I'm not the best at burnishing, that is almost a whole art in itself, but I am getting better at it. It's a lot of hand-rubbing. Gives a guy stamina LOL!
These tail straps are stiff, but they do soften pretty nicely with time. No worries about strength. I would hang off a cliff on any of them and I weigh about 195. This is probably even good enough for your average Norlin era LP custom! :ROFLMAO:
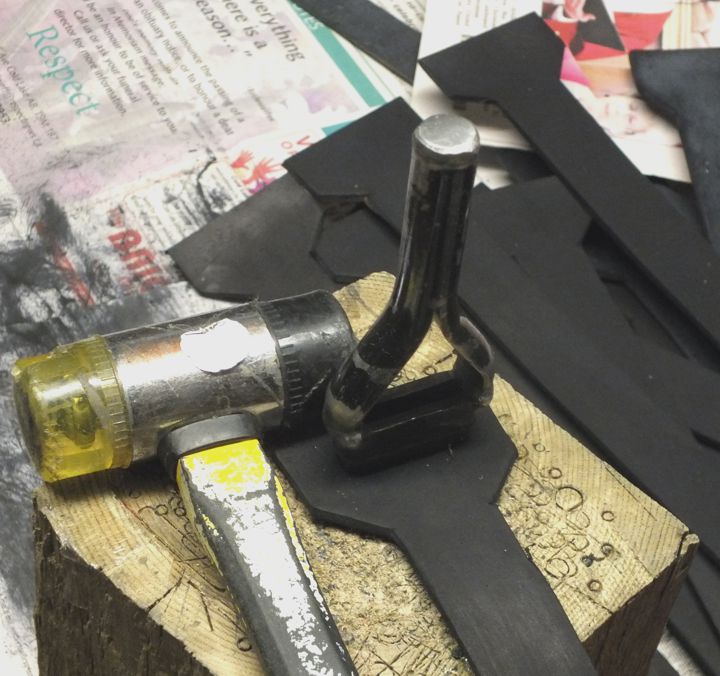
Last thing I do is punch the loop slot, which is 1-1/4 wide, and handles the just slightly less wide strap nicely. My oblong punch gets lot of use. Had to have it welded together twice. I sharpen it maybe four times a year, and it's not that easy to sharpen! With slots in these tails, I can hang them up to dry, and they are off my bench (which as you can see already has too much stuff on it).
OK with these tails straps done, I can move on to other things. Now on the bench sits a concept "Xonoth", the next Well-hung "No Prisoners" series strap.
Hope you enjoyed this.... more to come...
Endless source of eye-rolling dad jokes, aspiring empty-nester, custom strap-maker https://reverb.com/ca/shop/well-hung-guitar-accessories
We last left off with a concept pic of Xonoth. No it'\s not named after some anti-depressant med. It's a name created by Orc Name Generator
As you know the Well-Hung "No Prisoners" series I make are typically evocative of Barbarian/Mongol horde type themes, utilizing "aggressive" old belts I find usually by scouring thrift shops. I marry them to good leather in various ways with the end-goal of making a one-of-a-kind practical, comfortable and badass-looking guitar strap.
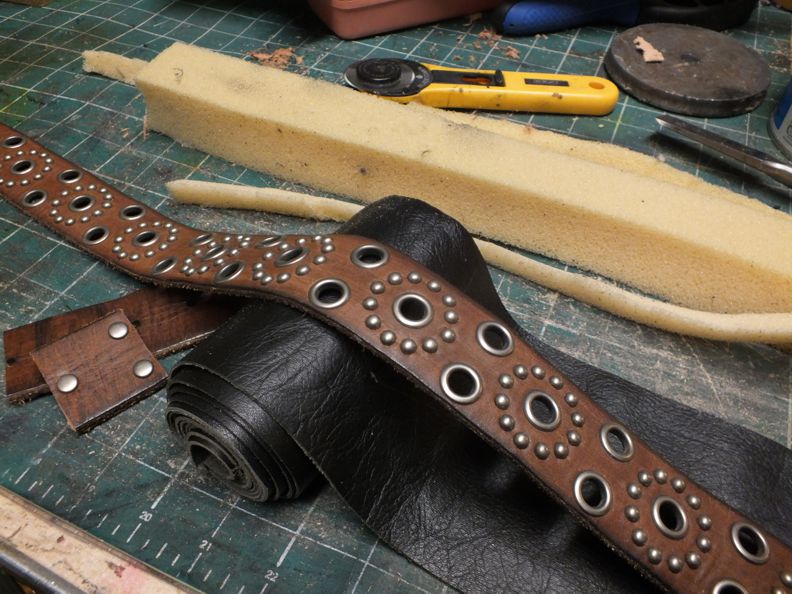
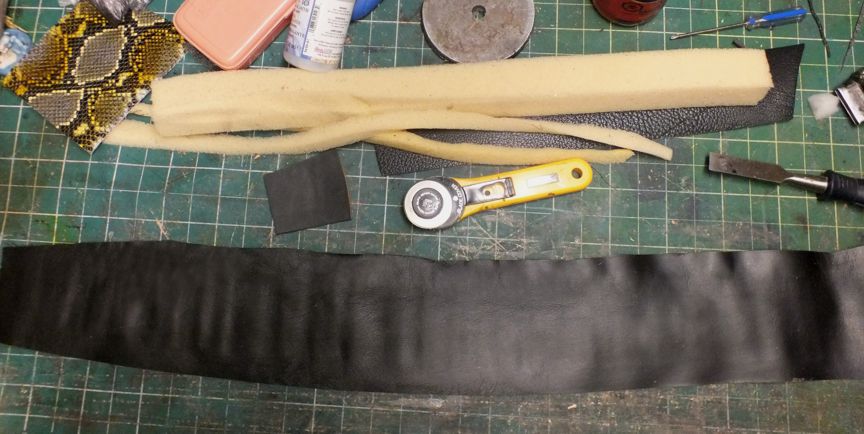
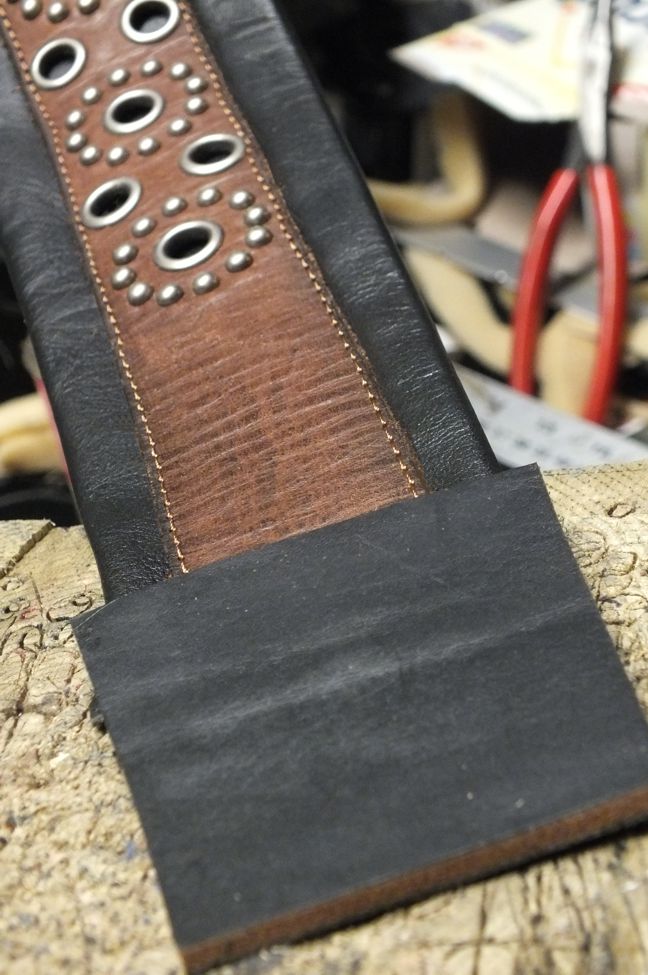
So, we decided brown on black here, first thing I have to do is create the base... this requires about a 4.5" wide strip of 2 oz black leather, with a special kind of padding I already put down inside.
Notice it's got a bit of a curve to it. Supposedly, when you have one with a bit of a curve in it, it will often provide added pleasure. Sorry. Couldn't resist. This is just before I fold/roll the edges over to make the base black strap at approx 3" wide - I normally make most of my straps at 3" or 2.5" wide, for better weight distribution and less pounding on pressure points.
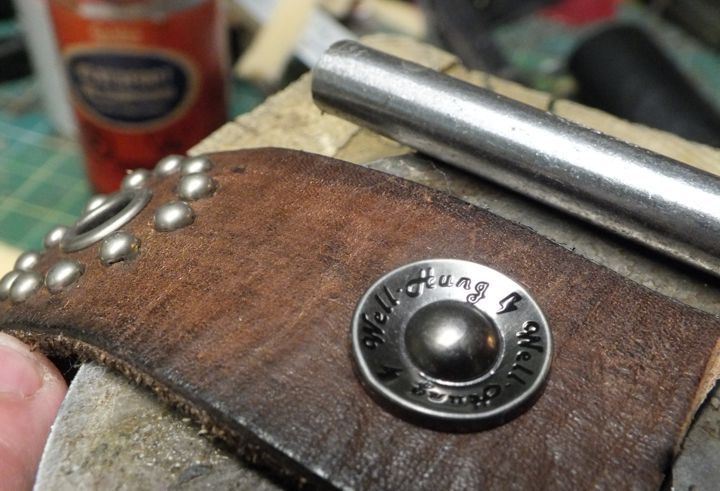
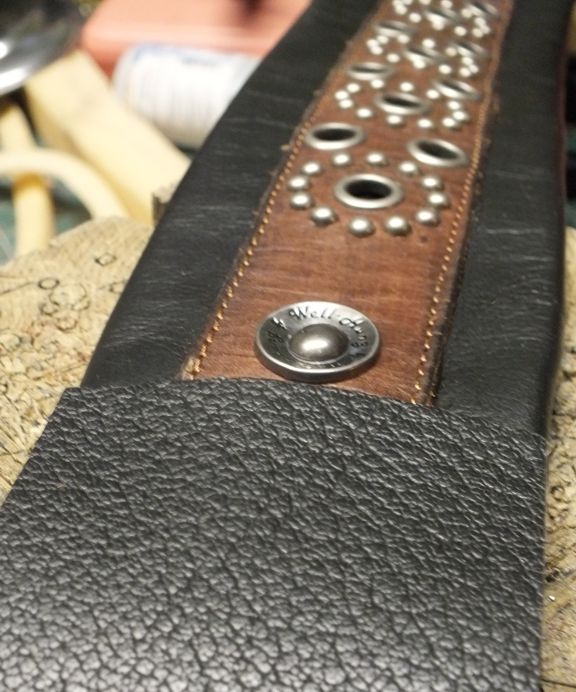
Now we gotta affix that belt to the black base, first off my little 1" tin emblem thing gets riveted on. This belt was really worn a lot by the owner. That's awesome, because it gives the strap some years and mojo already. Quite often i see these in the shop, with five six studs or grommets missing - if I think I can fix it, I may pick it up, but usually I will pass on those.
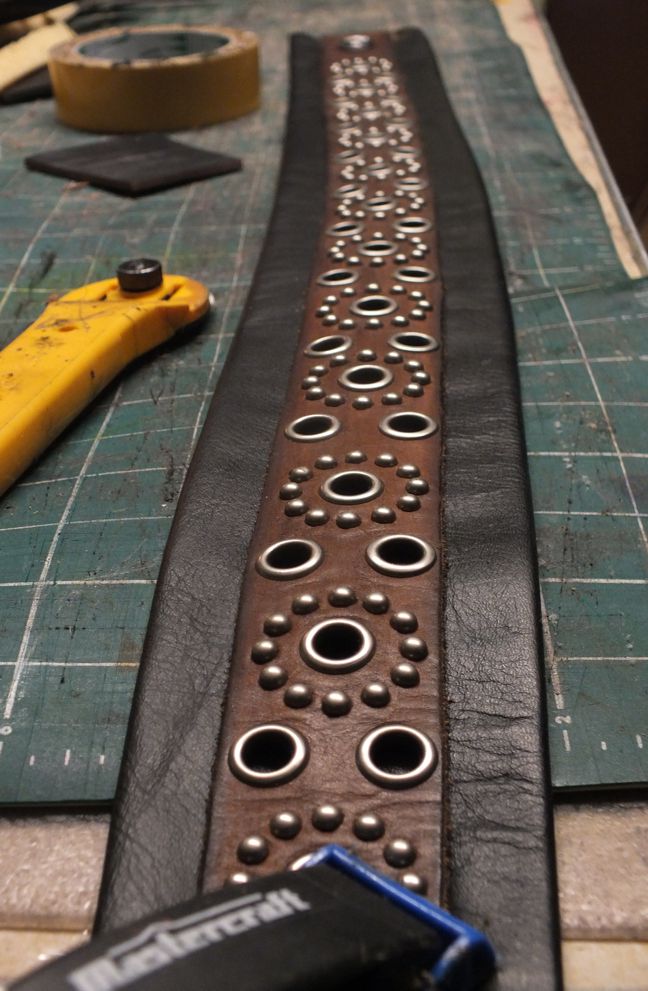
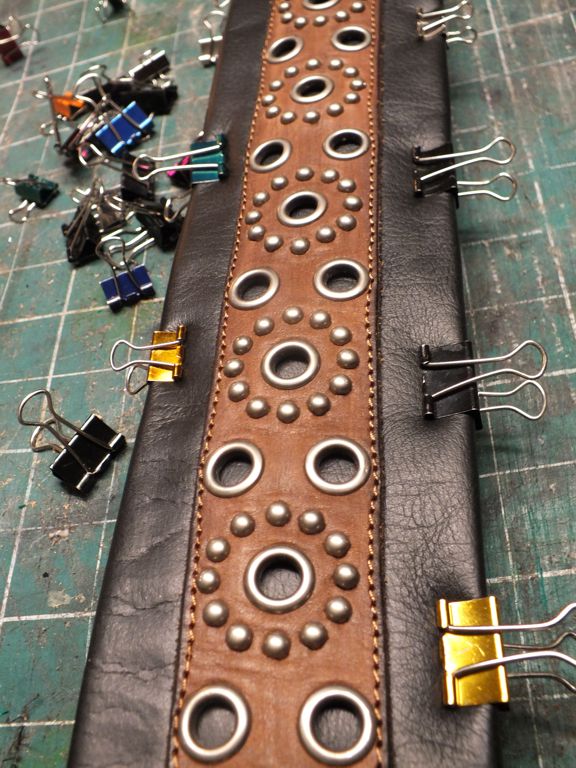
Sometimes these fashion belts come made out of synthetic stuff, and they can look great, but in this case this studded belt was some nice old leather. Now we have to line 'er up - I clamp one end and lay it down slow and careful. I'll put a few two-faced tape tabs hidden inside hold it in place prior to sewing.
Never get this part absolutely perfect, I just eyeball it as best I can. This belt features thirty six quarter inch grommets, and one hundred and fifty six 1/8" studs in aged nickel.
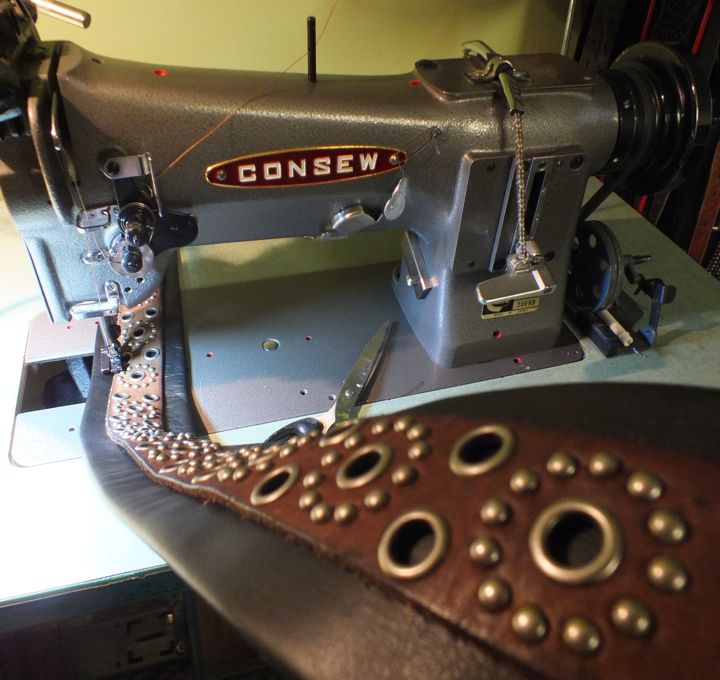
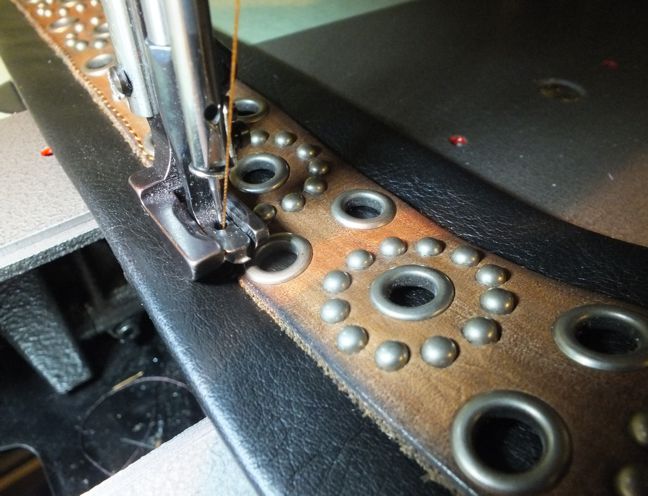
Sewing the top belt to the base with a semi-matching thread - sometimes I can't sew the best, so I rivet. Sometimes I can't even rivet so I'll use barge cement. Depends on the top decorative piece. I don't want to mess them up too much. That's my Consew RB201, I think it's called. This is a rather old but dependable mainstay industrial /factory machine, with a walking foot that helps feed things through. Using a regular sewing machine on leather is difficult, If you recall, I did for my first few years at this... an old 1954 singer I hot-rodded a bit for as much power as I could get out of it. But the Consew has serious punching power, and can sew up to about 1/4" thick material, with heavy duty thread and far stronger needles. When I purchased it, it was geared real high and just whipped things through crazy fast. It was actually a little bit scary. Did some belt pulley swapping magic on the motor end and got this thing down to a much more manageable speed.
Lower speed important here because the grommets in the belt are so close to the edge, less than 1 -1/16th of an inch, it takes quite a bit of sewing finesse to make sure we didn't bugger up the belt, or the base. Turned out alright when all said and done. Barbarian armored belt secured!
Next step now we have a base strap, is to affix a nose and tail ends. I use a good cowhide piece for the front/nose end... (note I leave a little space up the strap for the studs to start so they aren't rubbing steady on a guitar with a back pin).
I'm usually using Water Buffalo hide now usually for the dadder end. I do this because even when really thick and strong, it remains a bit flexible, sews nice and is easier to get through my machine sideways. Now I choose a lining for this strap. As many of you already know... I have experimented with a LOT of materials for lining. I am looking for TOUGH material, that feels good. Most of the time I am using heavy duty upholstery cloth with a "velvety" hand to it. If you rub it one way, you will feel resistance. The other way if feels smooth, place such a fabric on the lining the right way and you can totally kill off neck dive and have yourself a stay-in-place strap. Many of these are made for high-traffic use - like sofa upholstery, so it wears very well. As well, usually stain/ mold and mildew resisitant, hypo-allergenic, etc. I have made some with suede lining too, but suede gets real funky over time, and I prefer how quality heavy duty fabrics stretch over the secondary padding I insert into most of my straps.
So I carve up that additional padding, and place about a 22" length of it along the shoulder of the strap. Sorry, I don't want to show this because how i do this is proprietary, and makes my straps a bit specialler than most. I have large companies borrowing my ideas all the time, but this is one idea i don't want to be too open about. I assemble the lining in my special way over the padding and secure it together prior to final sewing.
Now back to the sewing machine... I'll add to this l8ter!
Endless source of eye-rolling dad jokes, aspiring empty-nester, custom strap-maker https://reverb.com/ca/shop/well-hung-guitar-accessories
I need more guitars so I can buy more straps! I am a fan of the no prisoners series and I have one...but there are so many other cool designs I would love to own. Xonoth looks like one of the best no prisoners ever. Future hall of famer being made right before our eyes!
Ok... continuing on! Sorry for the delay, had to make a quick video for COVID-19 safety for someone, ( I dabble in that still because, well I have the video production background). Don't think it'll win me any Emmys, but it gets the point across. Which reminds me, if anyone reading here now has like ambient "bed" style music on file that you might like to offer up royalty free, just so a fella like me can use it I'd appreciate that. Maybe we could work a deal out on something-something, y'know, y'know. I make a little of that stuff myself but in this case I just didn't have the time and didn't want to re-use something I already made/used before.
I like downtempo stuff with chords, and drones, maybe a little moderny trip-hop beat. Kind of there, but not there if you catch my drift. Synth, piano.. or guitar. Reverby.... Simple stuff not too busy. NOT Brad Gillis ESPN sports highlight shredding LOL! Well, maybe sometimes. anyway if it's sitting there in your soundcloud doing nothing, let's talk.
Back to Xonoth, Third Orc General during the Time of the Poisoned Kings, taker of No Prisoners!
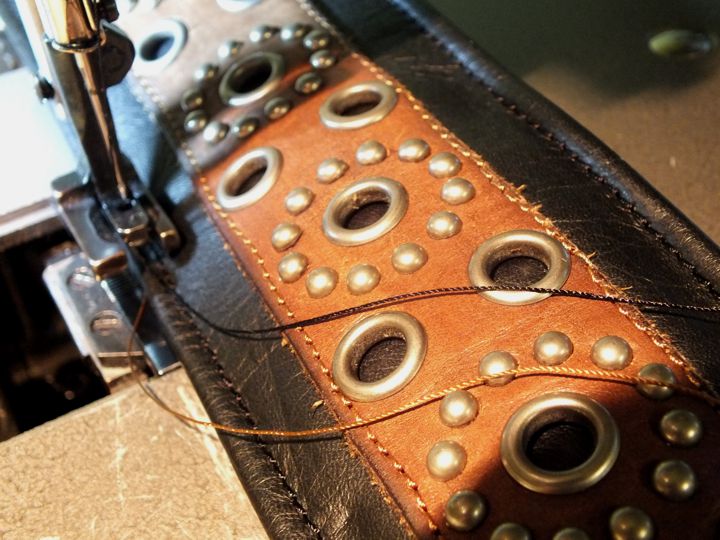
Here we are nailing 'er all together with T99 upholstery thread. Good strong stuff. You might be able to break a strand with your bare hands. Maybe two if you're a beast. But when it's stitched, it's secure. I've taken apart straps by big names to repair 'em, and too often I find most makers can use real cheap thread, sometimes they double-stitch to compensate, sometimes not.
Here you can see I use black thread on top, the bobbin underneath is loaded with golden brown, that'll be the stitch that shows underneath on the matching brown lining. Rolled leather edges, padding inside, makes a nice comfort difference as well. Have a look at the straps in your collection. You may have some with rolled edges. Many of you will find some with just raw cut off edges, which might bite into your neck a bit. You may not even feel the difference, until you know it's there.
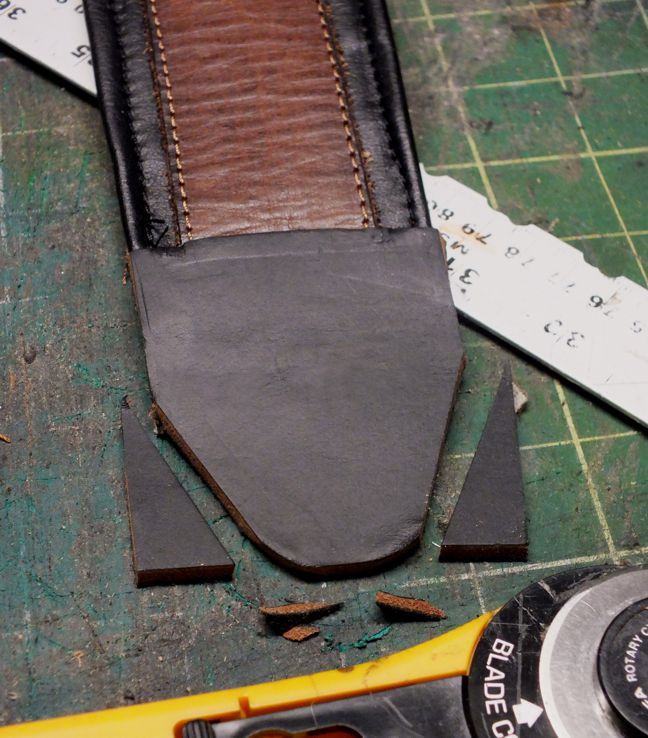
So, once I get the edges sewn to the lining, back to the bench to shape the nose. I probably should make a template, but right now I am doing most by eye, because it's way more crafty - Hey look! My fret leveling ruler also functions as straight edge! You can see a bit of raw leather on the edges here, we'll fix that up later.
Back to the Consew....
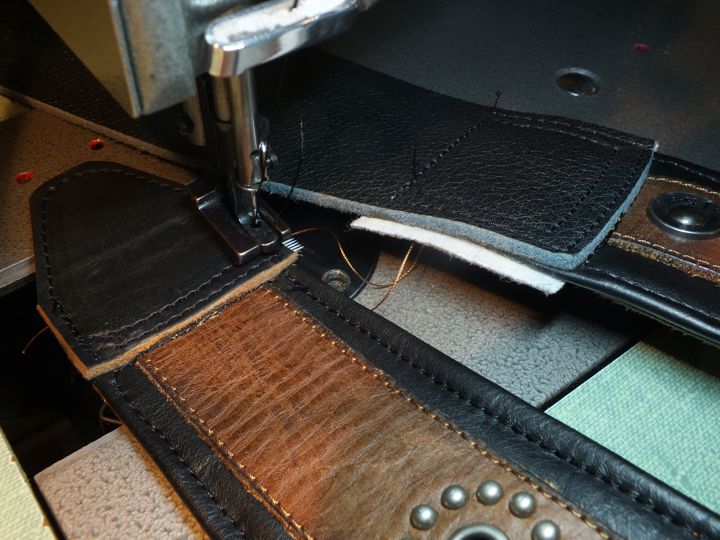
Here I am driving through some good depth of leather, lining and strap to marry it all together. I typically do a double seam on top and on the ladder end as well. They are also glued with barge cement... Strap ends are stable.
Bring it back to the workbench to dye the raw edges on the nose here. Then, I use my cotton webbing covered burnishing stick. Basically you wet it down, let it sit for about fifteen minutes then you rub that leather like crazy, getting some real heat going. Helps to add a little bit of gum tragicanth too, gets you a pretty nice smooth and shiny edge.
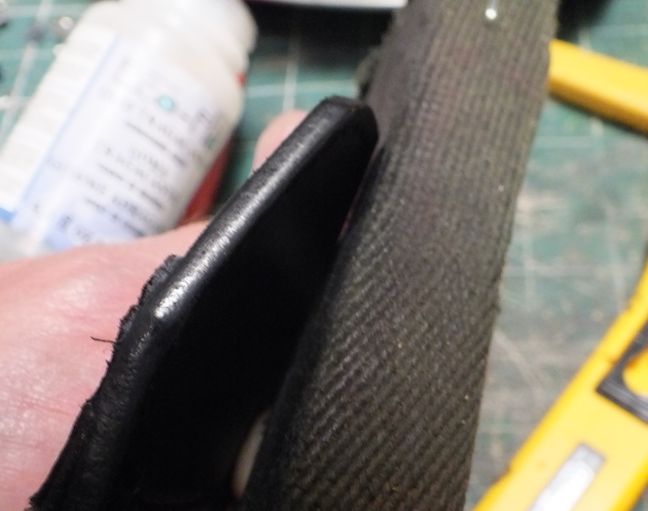
Looks great, feels "finished." Not all nose leathers can be finished this way, but this is one. I'm getting better at burnishing slowly, but like I said before it's kind of an art in itself. One day an electric motor burnisher polisher might be in order. It's kind of a lot of work but makes a nice difference in the end product.
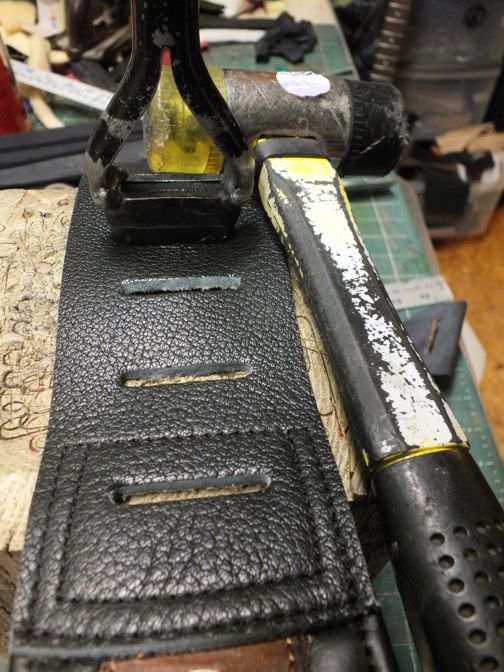
Now I pop some holes in for the tail strap ladder. I don't have a template, just eyeball it... slots about an inch or so apart.
Bang! Bang! Bang! Bang! repeat about ten times.
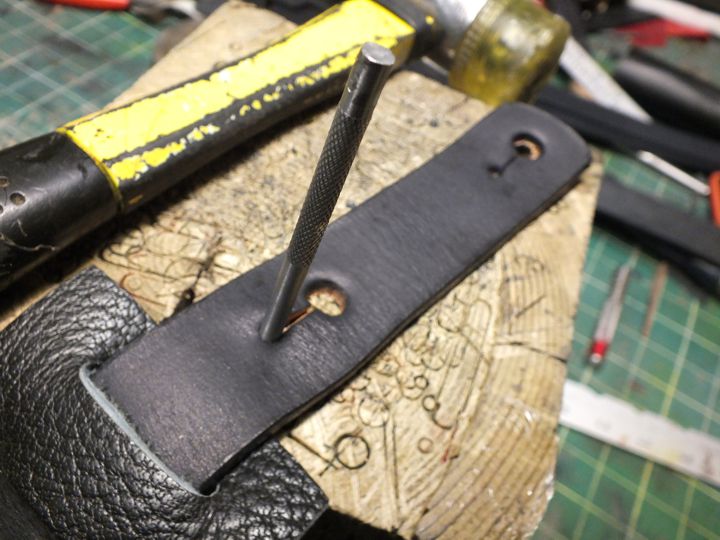
More banging still.... keyhole slots with the button holes. Even though this leather is in extremely low danger of "ripping" like other straps, I put the small punch holes at the end of the slot there because it looks right, and gives the leather a bit more flexibility to go over the button. One on the end, and another in case the one on the end ever wears out, you can just cut it off. Or you can use to upper one if the base strap is too long, this gives you three inches in reduced length, or more length depending on how you look at it.
Burnish the strap end, like the nose end, and... Ta-dahhhhhh!
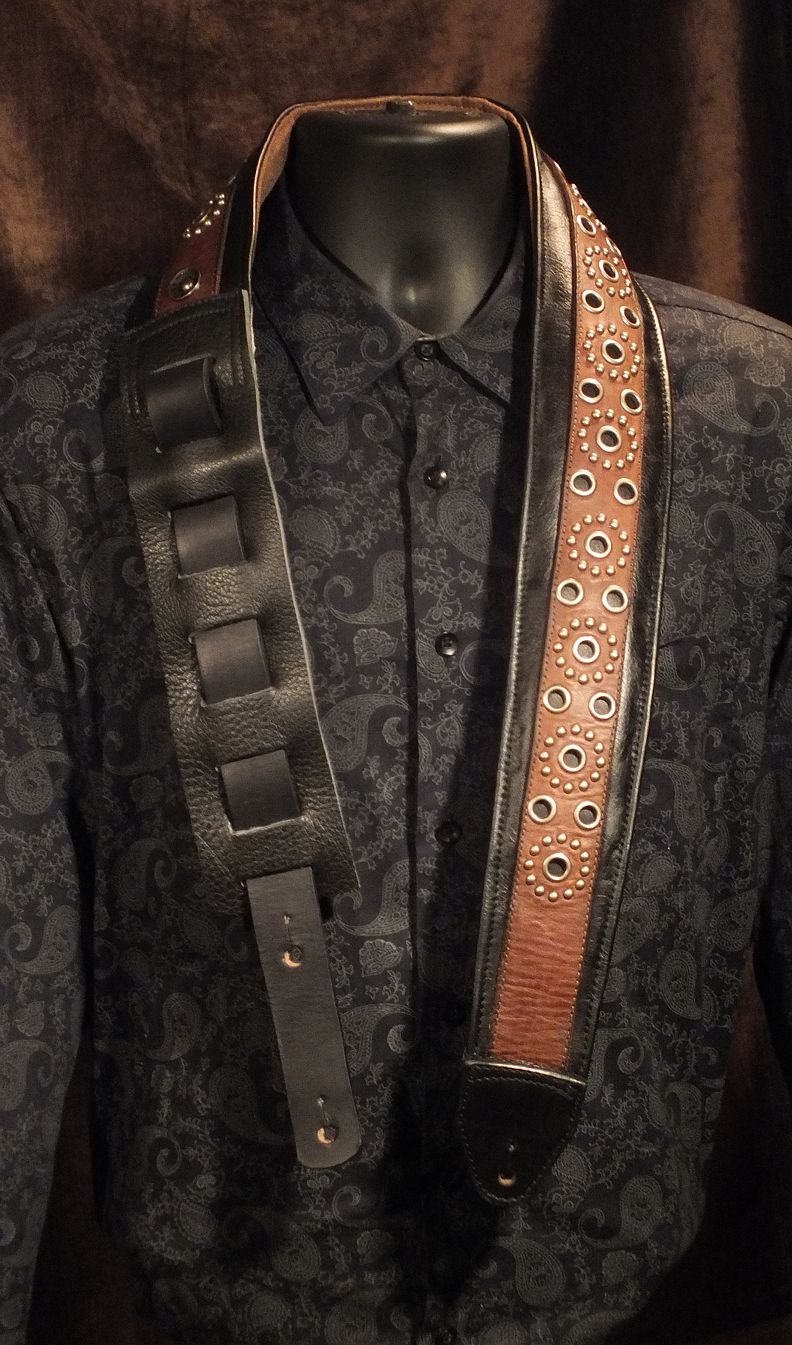
Xonoth... a 3" wide padded black and brown leather strap with aged bling. Goes about 46 to 57" - That's about five inches LONGER than many factory straps. OMG that bugged me for so many years. Buy an $80 strap and it's three inches too short, even on the last loop. I have a solution for that too.
Another handcrafted monster creatived in the Well-Hung (not a factory) Straplab. Xonoth soon to be up for public consumption. After I complete these, I'll take a bunch of photos in my little "studio" on "Felix," my paisley-shirted dummy, before putting it forward. Sometimes I'll take a few with a guitar, so I can stick a pic up on Reddit or wherever.
I like the results of No Prisoners because they're all unique, and I believe that's a key selling point... every guitarist should strive to have a signature type strap in the collection, something hundreds of others can't just grab off the rack. Something fellas at the blooz jam will be inspired to ask "Where did you get that?" And, you can say *wherever*. Great conversation piece. Plus, if you are really kind, might even let them try it just to watch the look on their face when they suddenly realize how comfortable a strap can be, like they can't believe they suffered bad straps almost their whole playing life.
Then you have to try and get it back!
Oh hey, here's something... look what a cultmember sent over today:
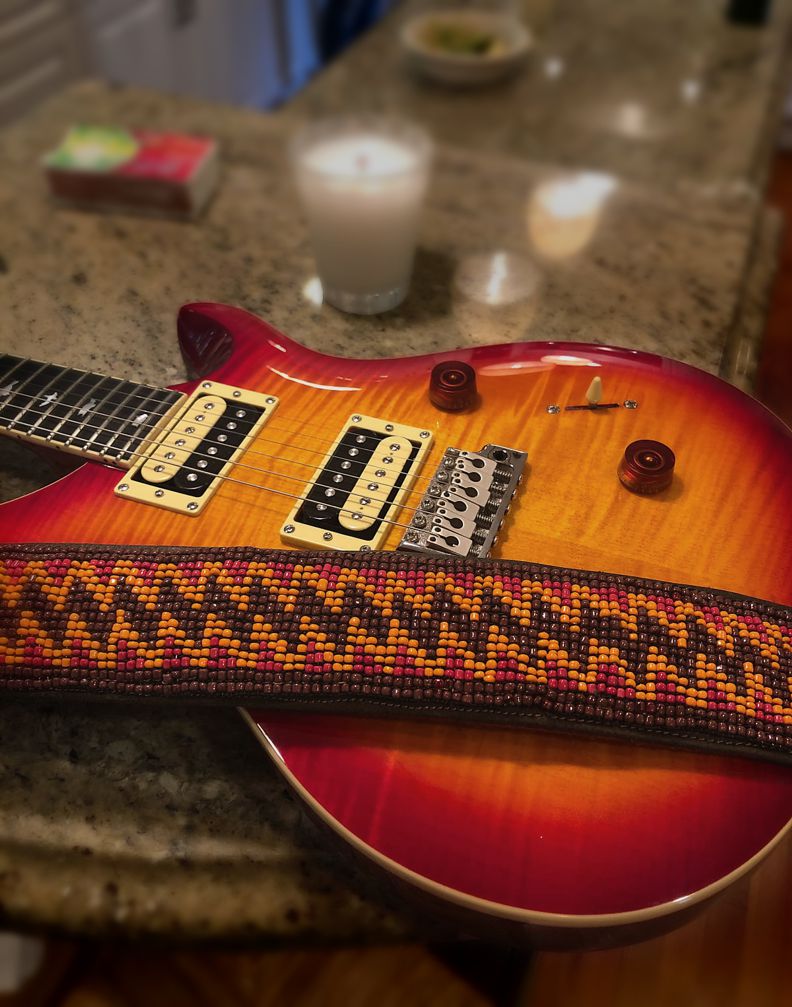
Not the guitar, unfortunately. Just the pic.
Endless source of eye-rolling dad jokes, aspiring empty-nester, custom strap-maker https://reverb.com/ca/shop/well-hung-guitar-accessories
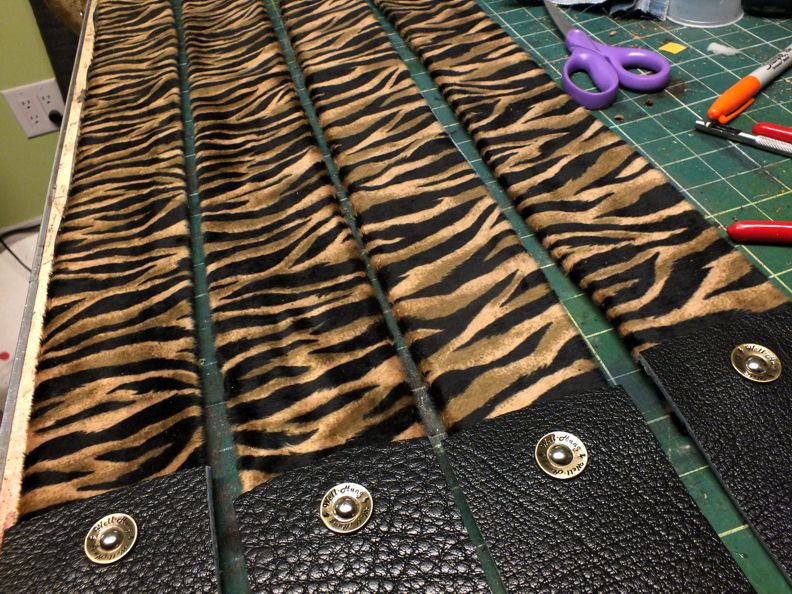
Today in the shop we have been working on a small replenishment of a Wild Thing Series item... I am suddenly now calling these "Tiger King" for obvious reasons. I am really trying to resist adding conchos, bullet studs, fringe and sequins on these to make them truly Exotic pieces.
These are made of the very hides of the beasts that biatch in Florida Carol Baskins wanted to get her crooked husband-murderin' claws on. But, that would not stand for my main-man Joey. To save those beautiful animals from such a terrible fate, he instead went on a four day meth bender and when it was all over, had somehow fedexed five tiger pelts to me. These move pretty good, so I'll keep making them until the material runs out. Last of the last bunch was eaten up a few weeks ago so time to train up a few more. Won't finish them today, probably tomorrow or the next day - 3" wide, padded, with good black leather. The perfect "Hey! Notice me! I'm a Wildman!" sort of strap.
Endless source of eye-rolling dad jokes, aspiring empty-nester, custom strap-maker https://reverb.com/ca/shop/well-hung-guitar-accessories
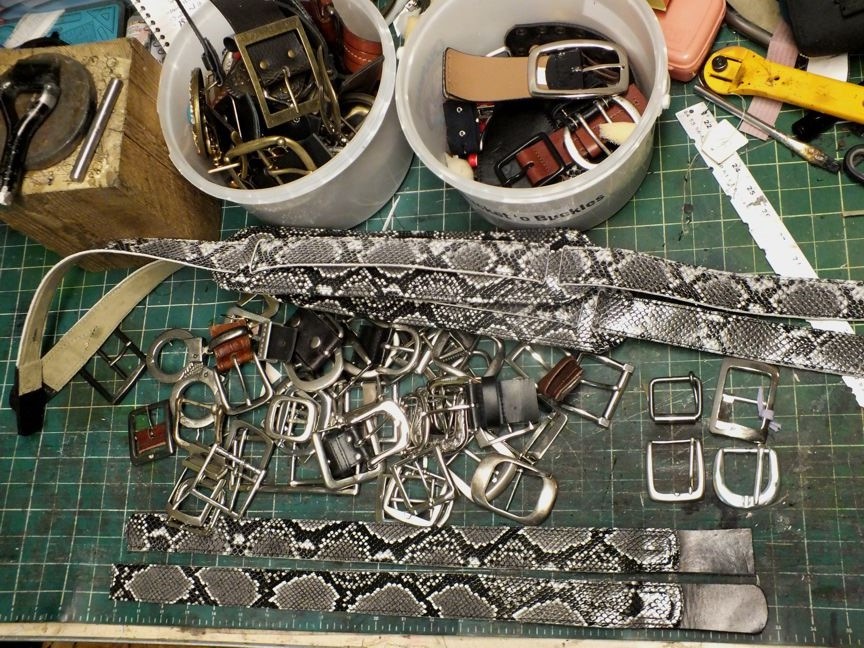
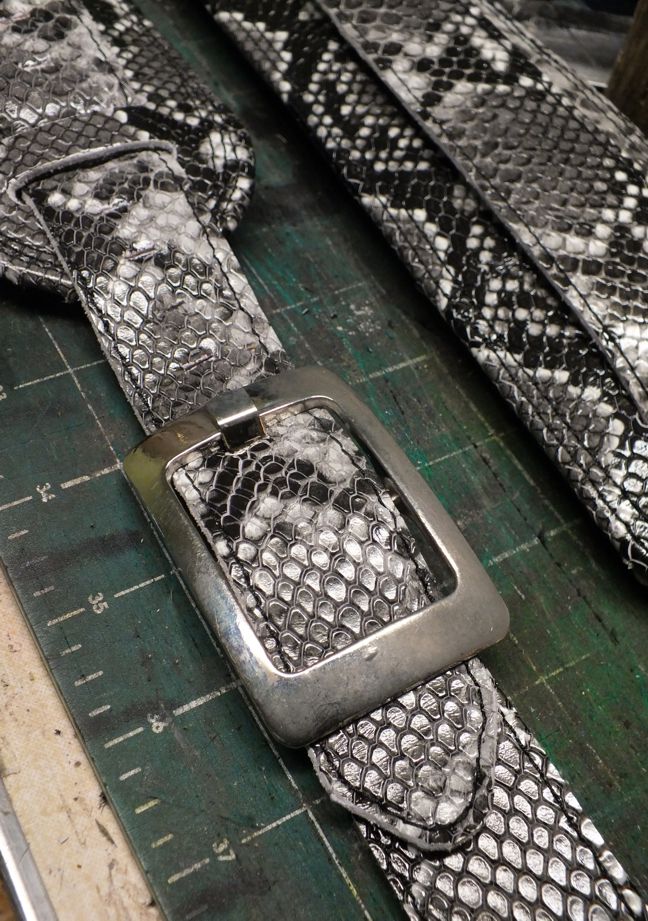
This morning I am finishing up on a couple of the graphite python floatin' pad straps. Just starting making these maybe 2 months ago, but they seem to sell pretty good, and it's a great way to use up scrap cuttings - so, here's a couple more on the bench mostly done. These are my fourth and fifth.
Hefted my pair of buckets 'o buckles up on the bench to sift through my hardware collection for this set, at first I was thinking gunmetal or black...
Job one was find some likely candidates with the right bar width for belt securement and pass-thru, this skinny strap is about 1-1/4 inch
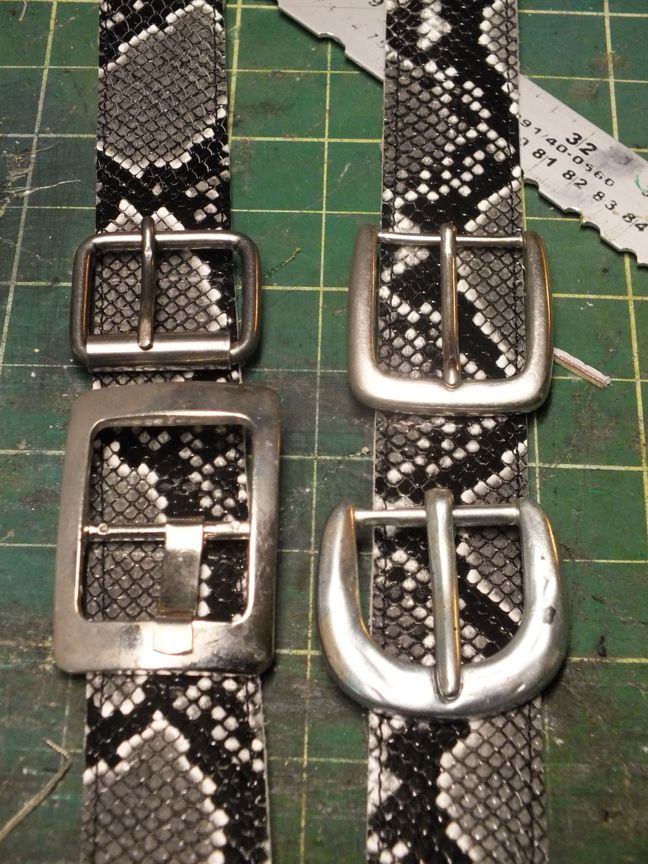
These four made the short list... A couple of things I like about used buckles in that they already have a little mojo, and they sure don't seem to make them like they used to. A lot of newer buckles I find, the tooth is really thin and flimsy... so you go to change it out and can't bend the metal... it just busts off... made of some pot metal or somesuch. The two buckles on the left made the final cut, the one on top is gunmetal in colour, the one below just kind of struck me as interesting, though it had a bit of a weird tooth or prong shape in a slot rather than a hole. Easy to deal with. I do like how it has center pin, gives the frame a built in-keeper to push the pass-thru down. The gunmetal roller will need a keeper loop, so we can hold any extra belt close to the tail strap, keep it from flapping all around.
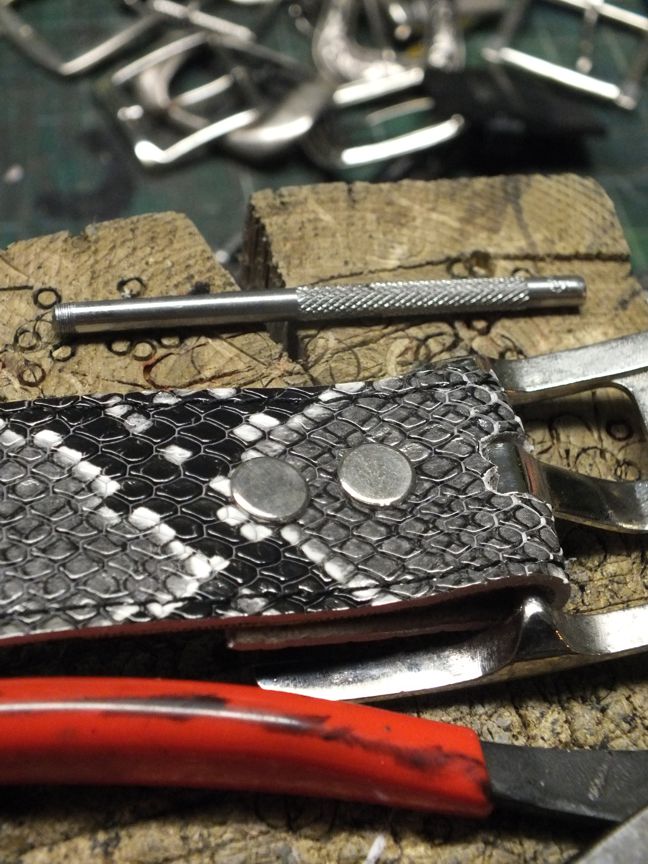
Securement to the lower tail strap via a couple of Chicago screws... redundancy is a good policy here. And... attached, prong slots punched.
Don't really know if this is the standard way others do it, but my instinct says put the buckle on the tail strap so the pass through falls down via good 'ol gravity. If you put the buckle on the main strap, then you got a chunk of tail flapping around up high and to me that's no good. So, probably another half hour to get the other buckle on, make a matching keeper loop for it and rivet it in place... punch some strap button holes for both, then she's photo time.
Endless source of eye-rolling dad jokes, aspiring empty-nester, custom strap-maker https://reverb.com/ca/shop/well-hung-guitar-accessories
^ Glad to know your strap arrived!
Endless source of eye-rolling dad jokes, aspiring empty-nester, custom strap-maker https://reverb.com/ca/shop/well-hung-guitar-accessories
I posted a picture and quick review of the Cheezies, but I hadn’t gone through the extra shwag to notice that you included some straps in the box as well!
*Been super busy and away from home and have a grand total of maybe 2 minutes playing with the strap so far.
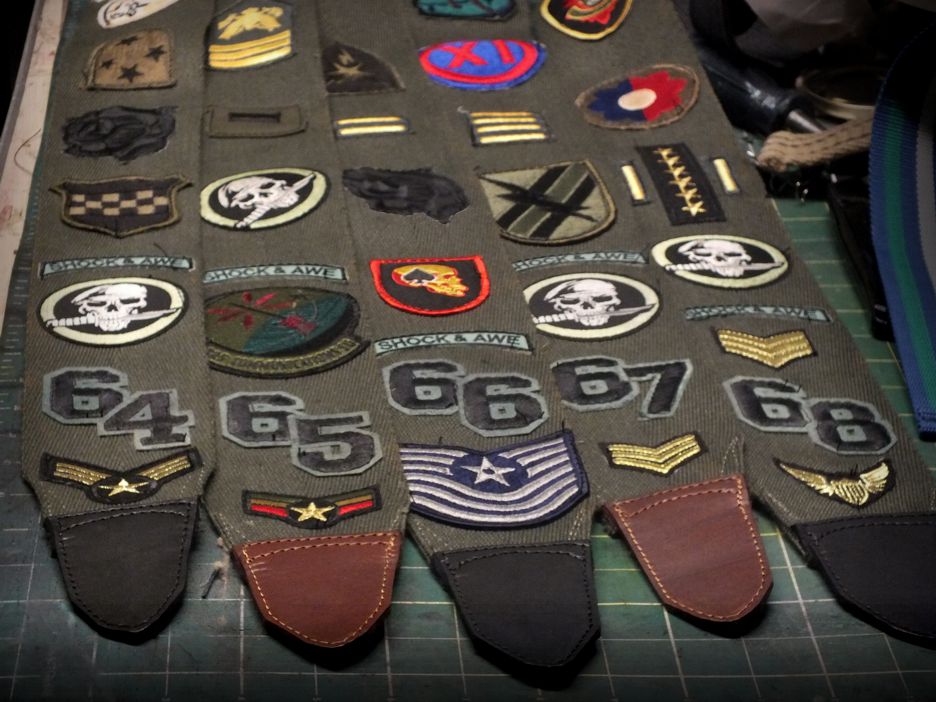
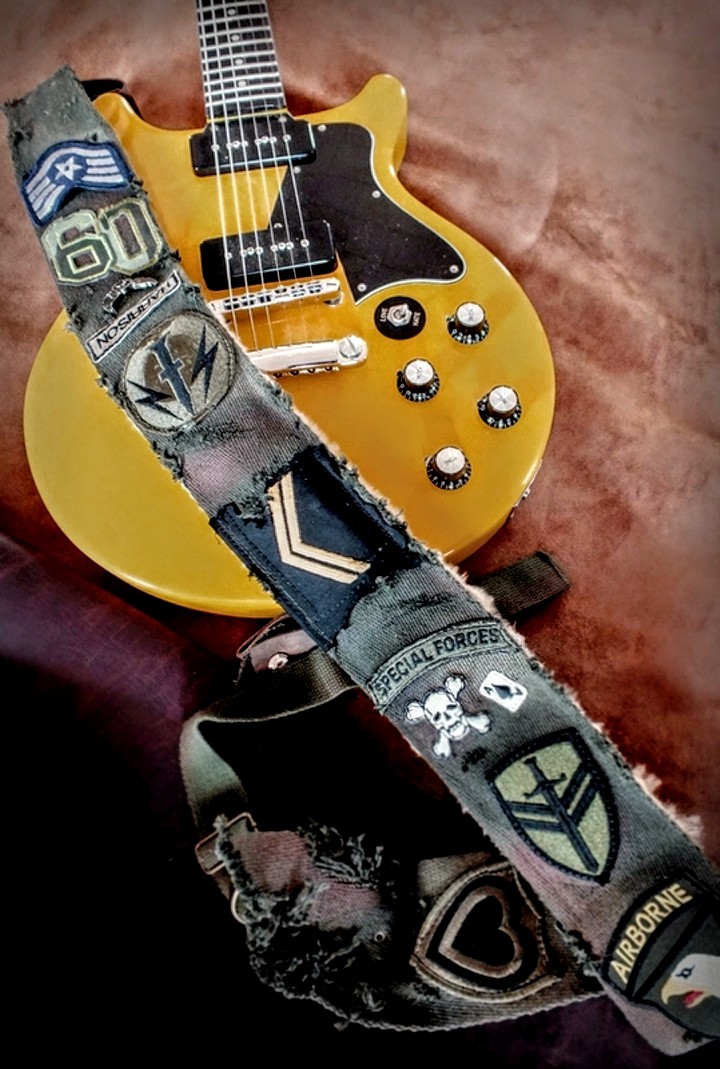
As of this week, the Well-Hung Shock & Awe milspec guitar strap series is into the mid-sixties now, stretching towards the 70's.
A number of AGF'rs are members of the militia, each one is individually patched, numbered, and these are soon about to be battle-distressed by yours truly. If one of these matches your birth year and you are considering picking one up, I do suggest putting my Reverb store on watch, or if you happen to be a strategic sort, just message me here to head off the listing. Personally, I'm a kid from '66 and to me having that one would be cool - but I already claimed my own early on, I kept #09 back for myself. There are even be a bunch out there predating my numbering system, but I can't remember how many of those I made, three or four maybe?
Life hacks from the master:
Endless source of eye-rolling dad jokes, aspiring empty-nester, custom strap-maker https://reverb.com/ca/shop/well-hung-guitar-accessories